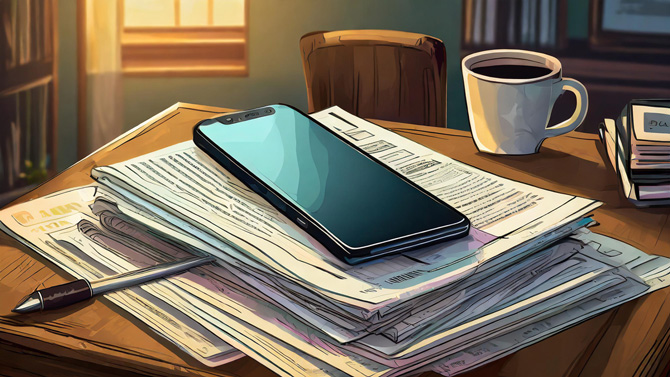
While most of our world is digital, the need to scan paper documents – from textbook pages and tax receipts to important paperwork – remains. For those using Google Drive, there's a convenient workaround to traditional scanning methods. The Google Drive app for both iPhone and Android comes equipped with a built-in scanner feature, leveraging your smartphone's camera to digitize documents effortlessly. No more physical scanner taking up room on your desktop.
Getting started
Before anything else, ensure the Google Drive app is installed on your smartphone. Android users likely have it preloaded, while iPhone users can download it from the Apple App Store.
Scanning your document
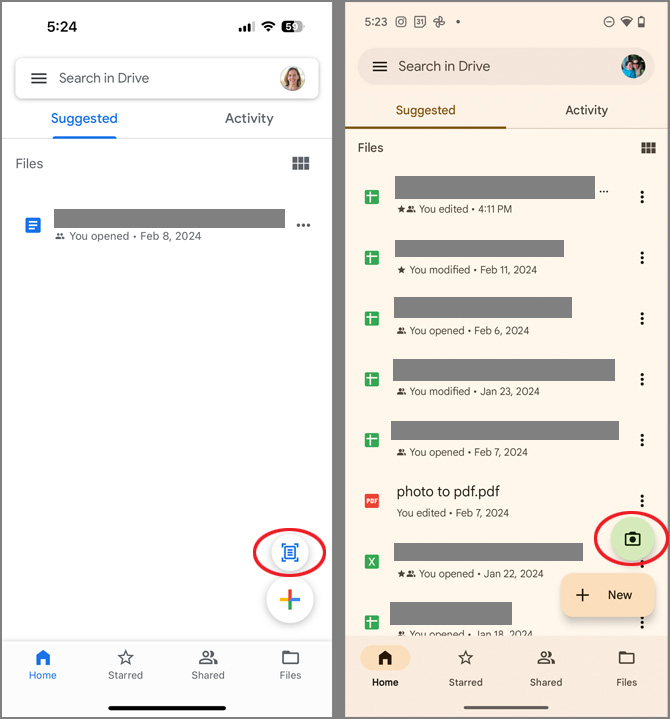
Once you have the app installed and open, scanning is simple. Tap the Camera icon (Android) or the Scan Document icon (iPhone) – the scanning feature defaults into Auto capture mode. If your phone is pointing at a document, you will immediately see a blue outline around your document, and the app should scan it automatically. You can press the capture button if it's having trouble or taking a while.
If the app is unsure if it has captured a clear shot of your document, it will prompt you to adjust the corners after capture.
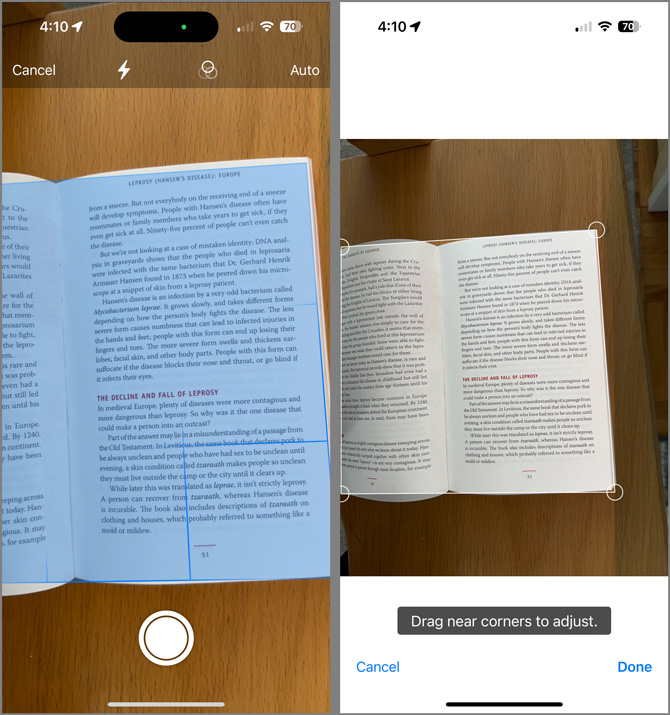
If you're working with an awkward document, like a folded book, and you aren't happy with your auto-mode results, you can manually scan your document. Select Manual (Android) or tap Auto to switch to Manual (iPhone). Position the document within the camera frame, ensuring clarity and good lighting, then hit the shutter button. For iPhone, you can adjust the corners to ensure your whole document is scanned and select Keep Scan. Android users can use the Crop & Rotate feature to adjust the corners and select Done.
Final editing and uploading your document
After scanning your document, you can clean it up with a final edit before uploading it to the cloud. For iPhone, you'll need to tap the thumbnail of the scanned document to access the editing tools. For Android, the tools appear along with the Crop & Rotate tool. Editing features include altering the crop, adding filters, or removing unwanted areas from the file. Tap the Done button when finished.
Once you have everything nice and edited, it's simple to upload to your Google Drive. The app will let you rename before uploading, so you don't get stuck with a generic timestamp name, and then sent to your Drive as a PDF file.
Helpful tips: Go Paperless with a Digital Filing System
After pressing Done, for Android users, you'll be taken to a screen to upload the scanned document to your Google Drive. For iPhone users, you'll need to tap the Save button, and then you'll be taken to the upload screen. You can now rename your file so it doesn't appear with a generic scan name. All documents are stored as PDF files.
If you're not a Google Drive user, read our story From Paper to PDF: How to Use Your iPhone's Built-in Scanning Tools for more ways to scan documents with your iPhone.
[Image credit: screenshots via Techlicious, phone document scanning concept via Adobe Firefly]
As a lifelong tech enthusiast, Hemant Saxena is always looking for the latest gadgets that intersect with his hobbies. For more than a decade, he has been writing about consumer gadgets, popular apps, and social media tips for publications, including Windows Club and Techmate Tricks.









From Kyle on February 13, 2024 :: 5:17 pm
The instructions you have listed are either incomplete or incorrect. There is no “scan document“ function in the Google Drive app on the iPhone.
Reply
From Suzanne Kantra on February 13, 2024 :: 6:06 pm
The Scan Document button is the circular button in the lower right corner with a blue rectangle icon with lines (it’s just above the Plus button - the circular button with the multicolor plus in it).
If you don’t see the Scan Document button, tap the Plus button to see the option to “Scan document.”
I’ll add a screenshot to the story to make it easier to find.
Reply