Whether you're arguing with customer service or just want to be sure you remember something, it can be handy to have a recording of your phone calls. And with a little pre-planning, recording a call can be as easy as pressing a button.
1. How to record a call on your Android phone
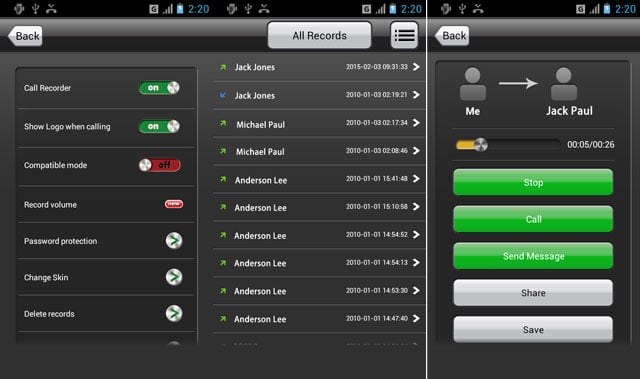
With the free Call Recorder app (there are a lot of apps with this name, so be sure to click on the link).
To record any call you make:
- Turn on "Call Recorder" in the setting of the app.
- Place your call.
The app will continue to record calls until you turn off the "Call Recorder" in the app settings. You can't start recording a call that's in progress, but if you turn on "Call Recorder" before you answer an incoming call, the app will record the conversation.
The Call Recorder app supposedly lets you set up automatic recording for specific contacts. In our testing, it was a none or all proposition.
2. How to record a call on your iPhone
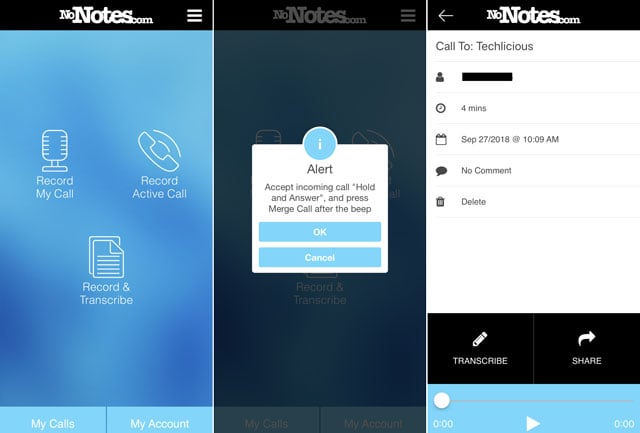
For iPhone, we like Call Recording by NoNotes. You get 20 minutes of free recording per month and you can record both incoming and outgoing calls. It works by creating a three-way call with you, the person you're calling and NoNotes.
To make a call
- Open the NoNotes app.
- Select the contact that you want to dial (or tap the phone icon and dial the number).
- NoNotes calls you and tells you how many free minutes you have left and then dials the number.
- Conduct your conversation as usual and hang up
After you hang up, your recording is available in the NoNotes app.
When you receive a call:
- Answer the call.
- Open the app.
- Select "Record Active Call". NoNotes will then call your phone.
- Select "Hold & Accept" and you'll be connected to NoNotes. You'll hear how many free minutes you have left.
- When you hear the beep, select "merge calls".
When you hang up, your recording will be ready.
If you make the call, you can choose the "Record & Transcribe" option, which will provide a transcription of the call.
Transcription packages cost $45 for an hour and if you want to record more than 20 minutes, you'll need to step up to an unlimited plan, which costs $11.99 per month or $99.99 per year.
3. How to record a call on your computer
The popular VOIP app Skype is the easiest to record because the latest version has call recording built right into the app (for Skype to Skype calls only). But for other apps, you'll need another piece of software to handle the recording. Most are designed to capture both video and audio from your computer, and they'll take some setup. You'll have to select which part of your screen you want to record and pick your audio source — and probably do some testing to make sure you have it right. But once you have it set up, all you have to do is press record. And once you do, you'll have both audio and video.
These are our favorites:
- Mac and Windows users can use Icecream Recorder to capture audio and video from their computer. The free version only lets you record five minutes of video, but the pro version will let you record as much as you want for $30.
- Mac users can use Quicktime to record calls from FaceTime or other video chat apps on their desktop — and while the instructions are for FaceTime it works for other apps, too. It's an excellent free option for Macs.
- Screencastify is a simple, free recorder that runs in the Chrome browser, so you can use it on Mac or Windows.
4. How to get a transcription of your call
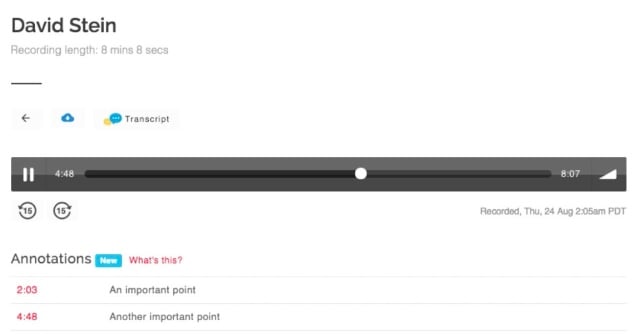
Recordator can record any call you make (it doesn't work for incoming calls) — so pretty much everything except voice chat apps like Skype and FaceTime. Using it is easy:
- Call into Recordator's dial-in number
- Press the + sign on your keypad
- Dial whoever you want to call
- When they answer, tap merge call
Like TapeACall, it's a three-way call and you merge them together to create a conference call that Recordator records. A slightly more complicated method lets you use Recordator even if your phone provider doesn't allow 3-way calling. To do this, just:
- Click New Call from your Recordator account page
- Enter the number you want to call
- Select Click-to-Call for Recordator to call you or Dial-to-Call for you to call Recordator.
When you receive or make the call, you'll be connected with your call recipient. Every call is saved in the cloud, where you can listen, organize, annotate or download them.
There's no monthly fee: instead, you'll pay a flat rate to buy a certain number of recording minutes, which cost $0.10 to $0.15 per minute depending on how many you buy. Recordator can also transcribe your calls into text — very handy if you want to easily review the call later — for the same per-minute rate.
5. Record any call using your phone's speaker
Let's say you're on your office speakerphone and you want to record the call. This method won't capture high-quality audio, and you can expect background noise, but it's as easy as it gets and you won't need anything special to make it happen.
- Set your phone on speaker.
- Use another device to record.
Your smartphone or computer will usually have a built-in app to record audio, or you can use a simple digital voice recorder. With any of these apps, you just need to hit record and then save the recording as a file when you're done.
- Android: Download the free Call Recorder app
- iOS: Voice Memos
- Mac: QuickTime
- Windows: Voice Recorder
If you want a stand-alone audio recorder, they're relatively inexpensive and are handy, portable devices that can record anything. The Sony ICD-BX140 digital voice recorder will only set you back $39.99 (check price on Amazon).
6. Record any call with a hardware voice recorder
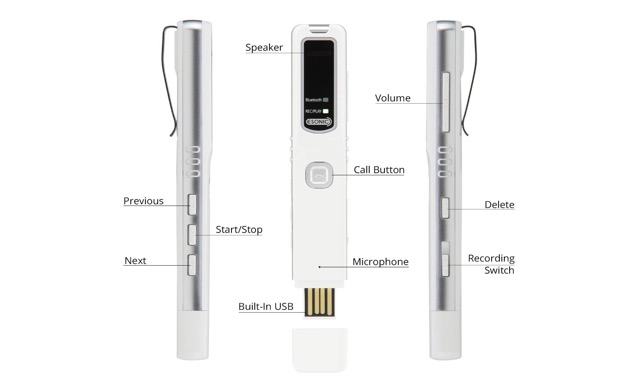
You can also turn to hardware to help with your recording. The RecorderGear PR200 ($109 on RecorderGear, check price on Amazon) digital voice recorder connects to your phone via Bluetooth and then you use it as a handset. Talk into RecorderGear and it will record the call. You can listen to calls from the device using its speaker or transfer recordings to your computers with a built-in USB connector. When you don't need to record calls, it also works as an ordinary digital recorder, so it's useful for recording anything. It will cost you $110, which is more expensive than other methods, but it's a handy device if you need to record things on a regular basis.
If you're mostly recording through a landline, you can get a simple connector that sits between your phone and your phone headset. This lets you attach a recorder between the two — any kind of recorder will do, from tape to digital. It's an inexpensive gadget, as you can pick up one like VEC TRX-20 for less than $20 (check price on Amazon). There's one snag, though: it has to be a corded phone.
Note: There are federal and state laws that prohibit secretly recording phone conversations. Before recording any conversation, you should check your local laws about wiretapping — and, yes, recording personal phone calls counts. Following the law is usually be as simple as making sure the person you're speaking with doesn't object to being recorded.
Updated on 9/25/2019
[Image credit: Woman recording on phone via BigStockPhoto, Call Recorder, NoNotes, Recordator, RecorderGear]











From Layne on February 12, 2019 :: 10:47 am
When recording the outgoing call on an Apple phone, whose number shows up on the person I’m callings phone?
Is it my phone number or Nonotes server number?
Thank you 😊
Reply
From Suzanne Kantra on September 25, 2019 :: 11:37 am
The number that shows up is your number, not NoNotes. That’s because you call into the recorder and then add the call that you want to record. You do have to remember to merge the calls or else NoNotes won’t get the audio. There is no sound to indicate that the calls have been merged.
Reply