Whether you're sending a holiday letter to friends and family or creating a presentation for a new business plan, the fonts you use can enhance the meaning of your words. The letters themselves can be quirky, conservative, elegant, or bold, among many others. If your Windows PC doesn't have the right font for your purposes, you can easily install more fonts, many of which you can use for free.
Finding and downloading new fonts
The Microsoft Store only has a handful of fonts (18 to be exact), in addition to the large library that comes preinstalled on your computer. So if you're looking for a font, we recommend using a third party provider like Google Fonts, Font Space, or dafont.com. On these sites, you'll find plenty of free options, as well as paid. Pay attention to whether you have the rights to use free fonts that you find. Some fonts are only free for personal use.
When you find a font or family of fonts (font versions in bold, italics and other variations), click on the download button and save the font in a place that you can easily find later for installation.
Fonts will either download as an individual font file (for example, TTF, OTF, OTC, or TTC file) or as a ZIP file. If you have a ZIP file, right click on the file name in File Explorer and select "Extract All." In the popup window, choose where you want the font files saved, check the box "Show extracted files when complete," and click on "Extract." A window will open with a folder that contains all of your font files. Leave the window open.
How to install fonts on a Windows 10 PC
1. Find the folder with your font files and select all font files you want to install.
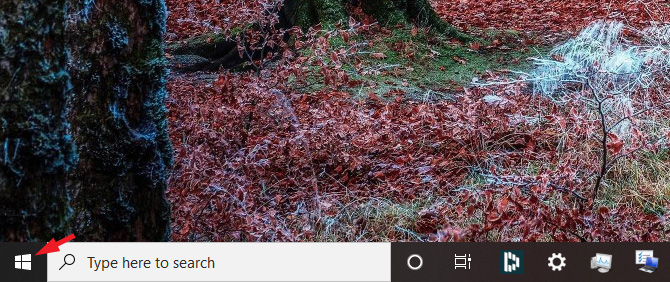
2. In the lower left corner, click on the Windows Start button

3. Select Settings (the cog icon).
4. In the pop-up window, select Personalization.
5. Select Fonts from the list on the left.
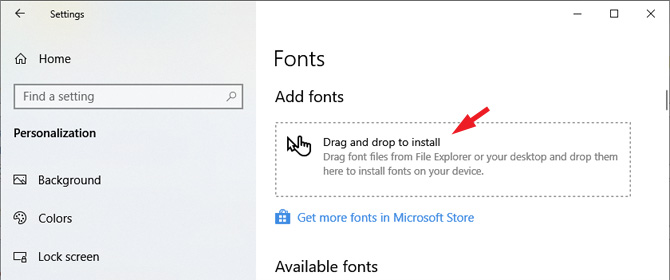
6. At the top of the Fonts page, locate the box "Drag and drop to install."

7. Go to the File Explorer window with the font or fonts you've downloaded and select all of the font files inside the folder. Once selected, drag and drop the fonts into the installation box.
Once you've installed a font, it will automatically show up as an option in your programs.
How to install fonts on a Windows 11 PC
1. Find the folder with your font files and select all font files you want to install.
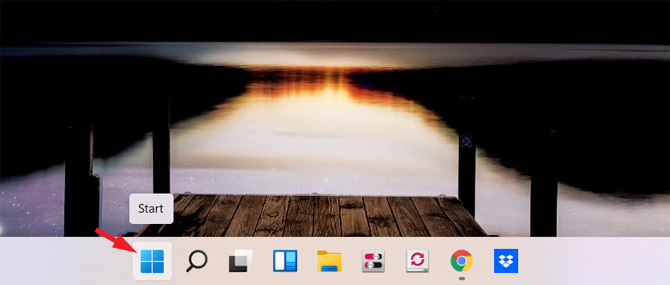
2. On the task bar at the bottom, click on the Windows Start button.

3. Select Settings (the cog icon).
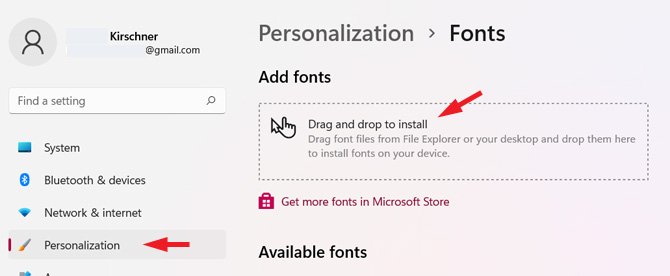
4. Select Personalization from the list on the left.
5. Select Fonts from the list on the right.
6. At the top of the Fonts page, locate the box "Drag and drop to install."

7. Go to the File Explorer window with the font or fonts you've downloaded and select all of the font files inside the folder (Ctrl+A). Once selected, drag and drop the fonts into the installation box.
Once you've installed a font, it will automatically show up as an option in your programs.
[Image credit: screenshots via Techlicious, Techlicious/Smartmockups]
Sagar Naresh Bhavsar has been writing about technology for more than two years. Previously, he was a staff writer at Guiding Tech and TechWiser. He loves working out, having a cup of coffee, and playing guitar.


