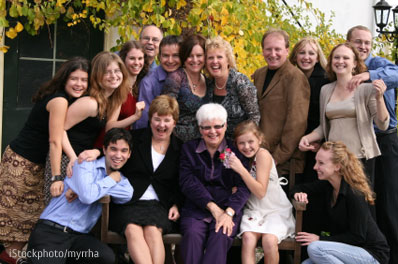
 Graduations, weddings, reunions, birthday parties—there are many occasions that call for a group shot. Taking the perfect group photo, though, can be challenging. People look away, blink, fix their hair.
I have easy tips you can follow for getting that group shot right. But you don’t have to take the perfect shot to end up with one. You can easily merge two or more photos together using applications on your smartphone or computer.
Tips for taking group photos
1. Get in close
The closer you get to your group, the more detail you can capture in their faces. Have people lean in toward the center to create a smaller target area.
2. Pose your group
For larger groups, you’ll want to stagger people in rows, so you can still see everyone’s face while fitting them into a smaller area. Don’t make the group too deep, though, or not everyone will be in focus.
3. Keep people still
If you’re going to merge your shots, you’ll want them a similar as possible to make the merge easy and undetectable. So encourage the group to remain in the same place.
4. Take multiple shots
Digital shots don’t cost anything, so fire away. If there’s good light and you’re shooting kids, try putting the camera into burst mode.
How to merge photos
For iOS devices, try the GroupShot app ($0.99 on iTunes).
- Select two or more photos you want to use from your camera roll.
- Select the best photo in the set as your base photo by tapping the swap icon
- Take your finger and swipe across the sections of the picture you want to swap out
- Tap on the picture you want to swap in.
- Repeat steps 3 and 4 until you’re satisfied.
For Macs and Windows PCs, I like to use Adobe Photoshop Elements ($89.99 on Amazon.com).
- Open the photos you want to use and then select two or more photos from the Project Bin.
- Choose File→New→Photomerge Group Shot in any of the edit modes.
- Take your best overall group shot and drag it from the Project Bin onto the Final window.
- Select one of your other photos in the Project Bin to use as your source image. Drag it to the Source window.
- With the Pencil tool, draw a line around the portions of the Source photo you want to merge into your Final photo.
- You can choose to show your pencil strokes and/or show your regions, which will be highlighted with an overlay.
- Repeat Steps 4 and 5 with any remaining photos.


From Tracy Shorter on April 27, 2012 :: 11:52 am
One of the best tips I’ve ever learned for taking a group photo was to tell everyone to close their eyes, then on the count of three tell them to open them! That way you don’t have to worry about having one or two people in the pic blinking!!! I love it!!!
Reply
From Josh Kirschner on April 28, 2012 :: 11:03 am
Thanks for sharing!
Reply
From Sue on May 01, 2012 :: 1:46 pm
What a great suggestion! Thanks so much for sharing. It always seems to be a problem with group photos that by the time you get every situated just right and ready to snap the pictures, everyone has to blink. I will definitely give this tip a try next week at my nephew’s graduation!
Reply