We may earn commissions when you buy from links on our site. Why you can trust us.
Review of the Philips Pasta Maker
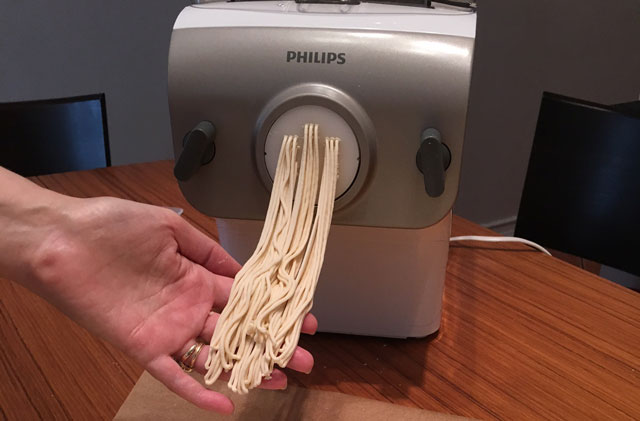
The Philips Pasta Maker gives even beginners the ability to make fresh pasta at home in fifteen minutes or less. Add a few ingredients (flour, water and/or egg), press a few buttons, and you’ll have fresh pasta with a smooth, consistent texture ready to go in minutes — more time for prepping your sauce! Shaping discs let you make spaghetti, fettuccine, penne or lasagna noodles, which you can use to make dumplings or ravioli.
With this pasta-making machine, you don’t have to be a practiced chef to achieve pasta that tastes homemade. It’s easy enough that children can get in on the action as well. And while cleanup does take a little hand work afterwards, key parts can go into the dishwasher, and others pop right out of the machine for easy access and hand cleaning.
How it works
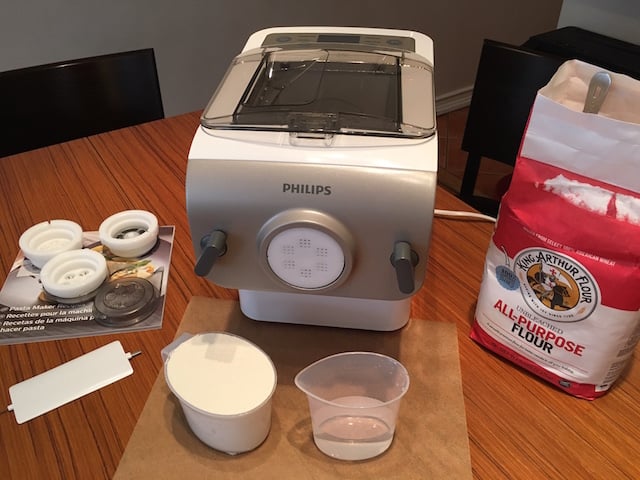
The Philips Pasta Maker ($239 on Amazon, retails for $349) comes with a base, a lid, a mixing paddle and a series of shaping discs to create spaghetti, fettuccine, penne and lasagna (You can buy additional pasta discs. There are sets of Thick Spaghetti and Tagliatelle Pasta or Angel Hair and Pappardelle Pasta, each available for $24.95 on Amazon). Additionally, there are flour and liquid measuring cups, a flat cleaning tool that doubles as a dough blade and a cleaning tool for two of the pasta discs, a user guide and a recipe book (in English, French and Spanish) for flavored pastas and more than two dozen pasta dishes.
I read the directions and found the machine easy to put together straight out of the box in only a little over two minutes. The machine weighs in at 20.7 pounds, with dimensions of 13.4 inches by 15.9 inches by 12 inches. It’s powered by a 200-watt motor that produces 1,600 pounds of force on the dough during extrusion, according to Philips.
The control panel has four key buttons: the on/off power switch, a start/pause button, a servings selector and a program button. The display screen counts down time as the pasta is being made and shows the serving size you’re making. All the buttons are clear and easy to read, and the program button lets you to choose an automatic program or an extrusion-only program.
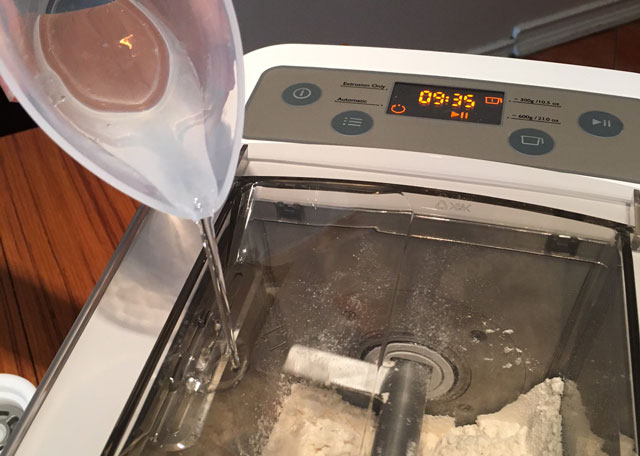
After opening the lid and adding flour into the mixing chamber, close the lid, turn on the machine and select program 1 (for one to three servings) or 2 (for a large batch of three to five servings, about 1.3 pounds or pasta). Press start. After the flour has rotated around a few times, begin pouring in the liquid ingredients (either water, egg, vegetable juice or a combination) through the small holes in the lid.
The machine blends the dough through a mixing paddle that looks like a long, wide metal corkscrew, first one direction and then the other.
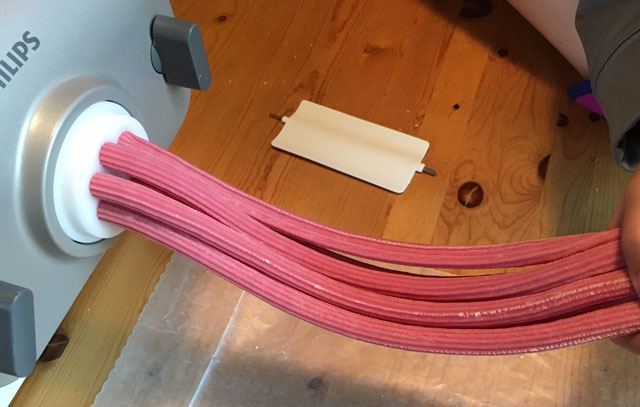
Once the dough is ready, the machine extrudes it through a disc on the front panel. It feels rather like playing with a grown-up Paly-Doh Fun Factory set — remember the one where you press the lever to extrude the Play-Doh and then cut it off as it comes through the molds? This machine does not cut the pasta as it comes out of the machine, so you’ll need to be prepared to do that manually with a dough blade, sharp knife, kitchen scissors or the side of the included flat cleaning tool/dough blade. My 11-year-old loved having the chance to cut it straight from the machine. Cut it off as it comes out of the machine, or allow it to come out in longer strands to cut later.
The Philips Pasta Maker does make some noise, but it’s much quieter than a mixer or blender. It’s surprisingly speedy, so you can make multiple batches of pasta quickly.
I found that each batch of pasta (no matter which style or flavor) leaves behind a small bit of dough, usually about the size of a medium to large gumball, in the bottom of the machine. When I’m making multiple batches of the same style of pasta, I leave it to be swallowed up by the next batch. If you don’t want to waste it, you could try forming a bit of pasta by hand or freezing and storing it for the next time you’re making pasta. If you happen to have kids, they’ll likely be happy to play with it like a blob of molding clay.
Before using your pasta machine for the first time, take out all the parts that come into contact with the dough, as well as the accessories, and wash and dry them. Water and a little dish soap is all you need. The main base of the machine where the electronics are housed should be kept dry.
Texture and flavors
While Philips says you can use any type of wheat flour or white bread flour in your pasta machine, it recommends a mix of durum semolina and all-purpose flour for the best results. For soba noodles, try spelt, whole wheat or buckwheat flour. We tested the machine using King Arthur Flour, Pillsbury and Bob’s Red Mill Whole Wheat Flour, depending on the pasta. Our very first test batch was slightly drier than expected, but it made the pasta easy to handle and there was less sticking to itself or the machine, which admittedly made for easier cleaning at the end of the process.
The key with this machine is precise measurements. Measure flour and liquid quantities carefully so as not to affect the recommended volume and ratio of solids to liquids. If you’ve used other machines and are used to doing things like adding more flour or liquids as it’s mixing or letting the dough rest, I’d advise against that with this machine. Just let the machine do what it’s supposed to do automatically.
It’s worth noting the flour cup that’s included with the pasta maker is not a standard 8-ounce measuring cup; instead, it holds 250 grams (1-2/3 cups) of flour. If you’re not using the measuring cups provided, use a kitchen scale that measures in grams to weigh the ingredients. (You can pick one up for less than $15 on Amazon.)
The pasta it produces is not particularly thin, although it’s not too thick either. There is no ability to adjust the thickness of the pasta, so if you like your pasta on the very thin side or extra thick or you want the ability to control the thickness, you’re out of luck with this machine. The lasagna attachment makes for some additional work in that you need to both cut the pasta and then flatten it. It comes out through a circular extrusion that leaves the edges slightly turned up. And one test batch of penne (in which I’d added slightly more liquid) came out with the ends pinched together. I was able to give them a gentle squeeze and they popped back open.
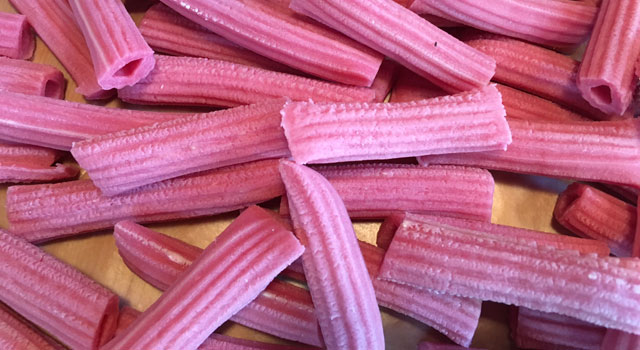
You can alter the taste and slightly alter the texture of your pasta by using different types of flours or changing up ingredients. We made test pasta both without and with egg, with beet juice and with carrot juice. Other ingredients like spinach juice, tomato juice, squid ink and herbs will change the taste or appearance of the pastas.
Juices make for only a little additional flavor, but because the machine does better with a drier dough, I’d hesitate to add much in order to achieve flavor from the liquid. But juices do add lovely coloring to the pasta. For one batch, I deliberately added more than the recommended amount of liquid (beet juice), and it did make the pasta a bit stickier.
The fresh pasta cooked in about three to four minutes. It was light, tasty and fresh, making us want to avoid heavy sauces and enjoy with things like fresh vegetables, olive oil and fresh grated cheese.
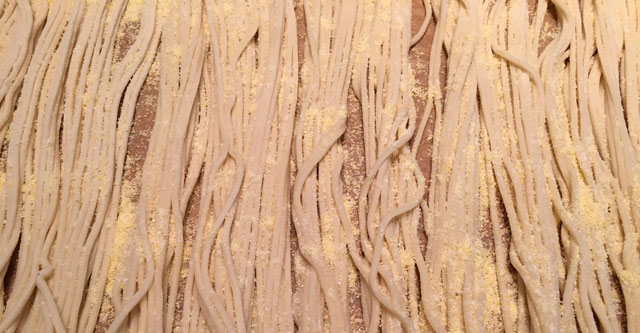
A friend who’d helped make one of the pasta batches with me pointed out the instruction manual should provide better suggestions for pasta “aftercare.” Should we hang it? Dry it on the counter? Put it in the fridge? In our case, we used just a bit of flour in one batch and a bit of cornmeal in another batch, and both worked well for storage in the fridge so we could cook the pasta later. Other batches we made within minutes of making the pasta.
Comments from friends, family and neighbors who tasted the final product included, “Wow! Who knew flour and water could be so great?” and “This pasta makes me want to never buy it from the market again.”
Safety
The Philips Pasta Maker has an automatic shut-off in the case of overheating. The manual suggests not using it for more than 45 minutes at a time (which would allow you to make as much as three pounds of pasta) before giving it a 15-minute break. The machine has a safety switch and lever that will not allow the machine to work if the lid isn’t properly installed onto the mixing chamber or if the shaping discs are not properly inserted.
The front panel on the machine that screws on and off in order to change the pasta discs and is made of metal and is quite heavy. If you aren’t careful, you could easily smash a finger or hand if it fell off while you were putting it on or taking it off.
Cleanup
One of the biggest complaints typically launched against automatic pasta makers is they are hard to clean. With soft pasta dough caught throughout the device, it’s certainly possible to find yourself spending as much time cleaning it as you did making the actual pasta.
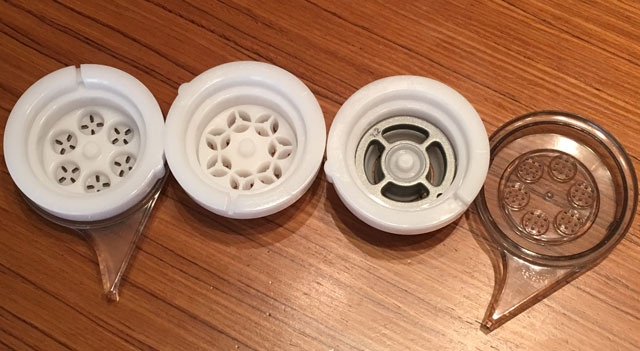
The Philips Pasta Maker includes a number of specially designed cleaning devices, including two plastic pieces that match the shapes of the spaghetti and fettuccini discs, with small protruding pieces of plastic that push through the holes where the pastas extrude. I’m not sure why Philips didn’t design the protruding pieces to be just another quarter of an inch longer. When you push them through, they finish flush with the surface, potentially allowing just a minuscule amount of dough to remain. I suspect that was done so the tools can store upright snugly in the shaping discs.
Another cleaning tool, which serves double duty as a dough blade, is made of a hard plastic and looks like a small, spatula-like head with small pieces of metal on either end. One of the metal pieces is for poking through very small holes in the pasta discs, and the second is for slightly larger areas. They will help you dislodge any leftover dough bits.
Overall, cleaning this machine is pretty easy. The dough pulls off or crumbles into pieces you can wipe away with your hand, a towel or a cloth. Extracting dough from the shaping discs is a bit harder but not bad if you use the cleaning tools. The manual suggests putting the discs into the freezer for a few hours before using the cleaning tool to push the dough out; this did work when I tested it, but I didn’t find it necessary. I was able to push extra dough through the holes with my fingers or cleaning tool.
The mixing chamber itself pulls right out of the machine and can be put into the dishwasher or washed by hand. I’d recommend that if you don’t need to put any of the plastic pieces in the dishwasher, don’t. You never know what will happen with plastic if your dishwasher is particularly hot. The mixing paddle also pulls right out and can be easily wiped down. Use a dry cloth to clean out any flour that may have made its way into the hole where the mixing paddle goes. I didn’t find any flour in there during any of our pasta making.
Philips discourages the use of scourers or gritty cleaners, which it says can “scratch the plastic surface and affect the lifetime of the pasta maker.”
A storage bonus
At the bottom of the pasta maker is a hidden drawer designed to store the various shaping discs as well as the cleaning tools provided for the discs. I found this to be quite convenient compared to some other pasta makers that require you to store the accessories separately. It’s worth noting that the drawer fits all the discs that come with the machine, but if you purchase others for additional varieties of pasta, some will have to be stored separately.
In the event of problems, the machine comes with a one-year warranty.
User reviews
The Philips Pasta Maker gets high reviews from users on Amazon, with a strong rating of 4.6 out of 5 stars with 218 reviews. Most users compliment the machine’s complete ease of use as well as the short amount of time it takes to make a pound of pasta.
The bottom line
Philips Pasta Maker |
 |
 |
Pasta lovers, whether you’re a novice pasta maker or a pro, will enjoy quickly and easily churning out fresh pasta in fifteen minutes or less. If you stick with the provided recipe, the pasta you turn out will be consistent.
And while you may think having pasta made on demand is something of a novelty, if you choose to make a space for this on your counter, you could find yourself making it on a regular basis with little effort and at an affordable price. With some experimentation and variations in flavors and flours, you can offer up pastas considered healthier than some more conventional pastas. And clean-up of the machine won’t take you longer than it takes to do your dishes.
Some might consider the Philips Pasta Maker an extravagance at $239 (on Amazon, plus $24.95 per set if you want Thick Spaghetti and Tagliatelle Pasta or Angel Hair and Pappardelle Pasta ), but if you like the ability to make your own pasta on short order, the Philips Pasta Maker will pay for itself down the line.
[Image credits: Eden Pontz/Techlicious]
Discussion 
Nicely reviewed. I had no thought of having a pasta maker but now I am thinking seriously of having one. You guys are master of decision changer. ![]()
Hello,
The engineering of the HR2357/05 pasta maker is great! Fast and reliable.. so far so good…
However, I am very, very disappointed with the flat pasta disks, like Tagliatelle, Fettuccine, Papardelle, Lasagne. The pasta comes very thick, almost 40% more than Barilla’s pasta. Cooking takes 55 minutes instead of 5 or 10 minutes. And the pasta is so thick, that it does not fold nicely in the fork. Question is if Philips has some plans to build and sell new disks.
I agree that the lasagne is too thick. I don’t have the Tagliatelle or Pappardelle, but I expect they are also too thick as would be ravioli cut from the lasagne. I think the Fettuccine is ok as is the spaghetti. My solution for ravioli, Tagliatelle or Pappardelle is to run the dough through this machine to make lasagne noodles and then put it through my manual Atlas 150 to make thinner noodles with the shapes I have on that (Tagliatelle or Pappardelle or lasagne - which I also use for ravioli). Yes, it is a bit complicated but still easier and much less cleanup than manual kneading and then running through the manual Atlas several times before I get to the thickness of the Philips. You do have greater choice of egg/flour/water ratios using just the Atlas but I find almost no difference in quality between fully manual and Philips only or Philips plus the manual. I know this all must seem like way too much for most people, but if your baseline is hand kneading and full manual past making, then the Philips is a big time saver for me.
Hello, on october 2018 I sent a review saying that flat pasta (tagliatelle, papardelle, lasagna) comes too thick on the Philips.
I found a company in Italy (https://pastidea.com), that manufactures compatible disks. They have more that a hundred shapes; the pasta comes out thin as it should be. These disks work perfect i the Phillips. They can ship all over the world.
Regards
Thanks for the tip, I just ordered some new dies and will let you know how they work.
I got this machine and have issues with it not processing through the cycle. I used the recipe in the booklet. Machine rotates the ingredients, stops, reverses and nothing further happens. No pasta goes through the discs. It worked fine the first 2-3 times but now I have wasted flour, time and effort on what I consider a useless piece of sh*t!!! Very frustrated with no help from Customer Service. Has anyone else experienced this?
This happened to a couple of times in the five times I used this since purchase. Today, it wouldn’t work at all. I troubleshooted with no luck. I called Philips Service (getting to the right group was a chore) and after 30 minutes on the phone they are sending me a new one. I can’t believe it’s only happened to the two of us.









From Fonda Rush on October 04, 2016 :: 9:55 pm
As far as the economy of making pasta cheaper than one can buy it, one would have to make a heck of a lot of pasta before the machine pays for itself. That said, the novelty of making one’s own pasta may wear off as using a bread machine to make one’s own bread. There are many in the thrift stores showing that the novelty had probably worn off. I wouldn’t reject one as a gift! Perhaps the price will go down before the end of the year.
Reply
From Josh Kirschner on October 13, 2016 :: 6:29 pm
It is a little hard to make the economy argument in the short run, though it becomes more reasonable over time, especially when compared to the price of fresh pastas. Though the real value here is being able to make the pasta you want, when you want.
And unlike a bread maker (which I’ve owned and later given away), a pasta maker offers immediate gratification and a product that is much more usable than the odd-shaped loaves out of a bread maker. If I didn’t live in NYC, two blocks away from a fantastic Italian market (and didn’t have a NY-sized kitchen), I would strongly consider adding a pasta make to my cooking arsenal.
Reply
From Shane Cousy on August 29, 2021 :: 5:47 pm
If you only have pasta once a week and buy only dry pasta, then even a good quality dry like De Cecco will be much cheaper over a long time. And if you don’t appreciate fresh pasta, then no need to buy this. The comparison is not between dry pasta and this machine, it is between this machine and 1) buying good quality fresh pasta for at least $6/lb where I live or 2) using a manual machine like the Atlas 150 I have been using for 40 years. This machine is hands-down much easier than the manual Atlas and we consume about 2 lbs of pasta a week, so we will break even in less than a year with fresh pasta prices so high.
Reply