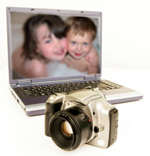
 If you don't know how to transfer photos from your camera to your computer, don't be embarrassed; many people haven’t taken the time to learn. But if the pictures are sitting on your camera's memory card, that means you're not sharing them with your friends and family. And, if the camera gets stolen or lost, so do your photos.
We’ve put together instructions for transferring your photos and promise it will be quick and easy!

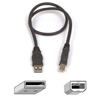
Belkin USB 2.0 Cable
There are two primary ways to get your images on to your computer.

Reader
First, you can plug your camera into your computer using the included USB cable. Make sure the camera is turned on, or else the computer won’t “see” it.
Second, if you have a memory card reader (either built into your computer or as a USB attachment) you can remove the memory card and insert it into the reader.
Doing either of these things will bring up a dialog box that will guide you through copying your images. But just to make sure you know what to expect, we're going to walk you through the process. We have step-by-step instructions for Windows XP, Windows Vista and Mac OS X.
Windows XP
- Once you've connected your camera or inserted your memory card into the reader, Windows XP will present you with a dialog box asking what you want to do with your pictures. Click "Microsoft Scanner and Camera Wizard” and then click "OK."
- When the Scanner and Camera Wizard appears, click "Next."
- The pictures on your camera's memory card will be displayed in the "Choose Pictures to Copy" page (by default XP will select all of the images). If there are pictures you do not want to download, just uncheck the box next to those photos, then hit "Next."
- You'll then be prompted to enter a name for the group of images on the "Picture Name and Destination" page. The name you choose plus a number, will be applied to each of the pictures you download.
- After choosing a name for the group, a folder will be created with the group name in the “My Pictures” folder. If you want to save your pictures in another location, click "Browse" to select a destination folder in which to save your pictures.
- If you want to erase the images from your memory card after they're copied, click in the check box next to "Delete pictures from my device after copying them" and then click "Next.".
- XP will then present you with an "Other Options" page where you can choose to publish your pictures to a Web site or order prints. If you don't want to use any of these additional options click "Nothing," and then click "Next."
- Your images will now be copied to the computer. Click "Finish" and a window will open showing the pictures you downloaded from your camera.
Windows Vista
- Once you've connected your camera or inserted your memory card into the reader, Vista will launch an AutoPlay window. Click on "Import Pictures and Videos."
- Windows will then find new photos and videos on your camera's memory card. (You can't select which ones to copy; all are automatically transferred.)
- Once the scan is complete, you are prompted to add a tag to the images to help you better organize them. You can also click "Options" to change where your photos and videos are stored and how the images will be named. Photos will be automatically saved in the “Pictures” folder and photos will retain the name the camera assigns them if you do not change the settings and do not assign a tag. If you do assign a tag, the name you choose plus a number will be assigned to each of the pictures you download.
- Click "Import."
- While your images are copying over, you can click the check box next to "Erase after importing" to clear out your memory card. Otherwise, the images will remain on the camera's card.
- The folder where your images are stored will then automatically open.
OS X
- If you've never imported photos before, a dialog box will pop up when you connect your camera asking if you want to use iPhoto. Click "Use iPhoto." If you've already set up this option, iPhoto will launch in “Import” mode.
- In the “Devices” list you'll see the name for your camera or memory card. You'll also see a box where you can assign a name to the group of photos, called "Event Name," and an area for you to enter a brief description of the images. This will assign photos to a particular folder.
- Once you've entered that information, click "Import" to transfer photos and movies from your camera to your iPhoto Library.
- A dialog box will appear with the choice to keep or delete the photos on your camera or card.
- You will then see the photos you just downloaded appear in iPhoto.
- Once you're done, make sure to right click on the camera or card name in the ”Devices” list, select "unmount" and wait for it to disappear.

From kathleen smith on June 22, 2012 :: 1:49 pm
50th Anniversary
Reply