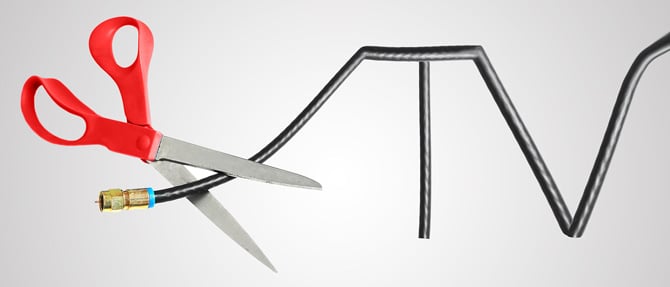
In addition to high prices, absurd fees, and notoriously bad service, the recent breakdown in negotiations between Spectrum and Disney (which took the U.S. Open and many other popular sporting events offline) has pushed many people to finally consider replacing their cable service with streaming. I made the switch nearly a decade ago, when streaming was still in its relative infancy, and things have only gotten easier since then. Even my 82-year-old mother has made the transition. And believe me, if she can do it, anyone can do it.

The steps to switching are the same whether your cable provider is Spectrum, AT&T, Comcast, DISH, Verizon, or any other company. In this comprehensive guide, I'll walk you through the steps to cut the cable cord and make a seamless transition to streaming, with our editors’ recommendations for the best streaming devices and services based on our testing.
Step 1: Evaluate your current cable plan
Before you dive into the world of streaming, assess your current cable plan. This includes understanding your contract, monthly costs (including all the absurd fees), and the channels you're subscribed to. If you’re in a bundled package, determine what your costs would be if you only used the cable company for internet access and dropped the TV portion. Most companies offer bundle deals, and when you remove TV service your internet fees may go up.
Step 2: Determine your streaming needs
Make a list of the channels you regularly watch and any premium services you are subscribed to, such as HBO or Showtime. Be realistic here. While most cable services boast of the hundreds of channels they offer (and charge you for), chances are you only watch a dozen or so on a regular basis. Figure out which are must-haves and which you can do without so you can cost-compare accurately with the streaming options.
The streaming landscape is diverse, with a multitude of services catering to every preference. Almost every channel or show you get on cable can be found on streaming (there are a few exceptions, such as NY1, which is only available on Spectrum).
To replicate the most “cable-like” channel line-up with streaming, look at Sling TV, hulu + Live TV, and YouTube TV. Each offers a wide selection of popular channels, along with access to local TV programming, sports, a familiar-looking channel guide, and cloud DVR storage. YouTube TV is a little pricier but offers more channels. None require a long-term contract, so you can try them and see which you prefer.
If all you really need are local channels, an inexpensive indoor TV antenna, like our recommended Mohu Leaf, will do the trick.
Once I made the switch to streaming, I found that I didn’t miss the old cable channels much, as there was so much fantastic new (and better) content to watch on the various streaming channels. Netflix and Amazon Prime Video are the channels my family turns to most frequently, with the latter being free if you’re a Prime member.
You could be more than satisfied with just the above choices, though Max (formerly HBO Max), Peacock Premium, and Paramount+ are all excellent additional channels. You can explore their content collections online and choose the ones that fit your interests and budget.
Step 3: Make sure your TV can handle streaming
Any TV with an HDMI port can be used for streaming. This means that unless your TV is ancient, it will work. And if your TV is that old, you’re only getting a crappy low-definition picture from your cable company anyway, and it really is time for an upgrade. Considering you can buy a pretty good 55-inch from LG, TCL, and others for under $400, there has never been a better time to upgrade, even if you’re on a tight budget.
Step 4: Figure out which internet provider to use
When dropping your cable TV subscription, you always have the option of keeping the internet service from your cable provider. If it is working well and the price is reasonable, there’s no need to switch. However, this is a good time to consider other options that may be cheaper, don’t lock you into a long-term contract, or provide more reliable service.
Streaming relies heavily on a stable internet connection. Full HD (1080) streaming requires a data connection of around 5 Mbps and 4K requires at least 25 Mbps. Multiply those bandwidth needs if you will be streaming to more than one device simultaneously. For most homes, 100 Mbps service will be more than enough bandwidth. Cable companies like to tout their 1-gigabyte plans, but there’s little point in paying extra for bandwidth you will never use.
If your cable company isn’t giving you a good deal, you can consider switching to a 5G home internet service. When I reviewed T-Mobile 5G Home Internet, it was very easy to set up (with no need for wires in your home), and speeds were plenty fast (100 Mbps+) to support multiple video streams. It’s also inexpensive and doesn’t require a contract, so you can test it yourself before you cancel your cable company’s internet.
Step 5: Choose the right streaming device
To enjoy streaming content on your TV, you'll need a compatible streaming device. If you already have a smart TV, that makes the decision pretty easy – just connect your TV to your WiFi network, and you’ll be off and running.
If you don’t have a smart TV or you don’t like your TV’s interface, a Roku, Amazon Fire TV, Google TV, or Apple TV streaming stick or box offers an affordable alternative to a smart TV. All of the major streaming apps are available on all of the devices, so the decision of which is best for you is based on features and price. We’ve tested them all, and our top picks are Roku and Google TV. The difference between them largely boils down to Roku offering the most straightforward, easy-to-use interface, while Google TV does a better job at surfacing and managing content from across streaming channels. Google TV also allows you to subscribe to many apps through Google Pay, which can simplify signup and subscription management.
Roku offers a wide selection of devices with varying features and prices. It can be a little overwhelming, so we created a guide to Roku streaming players with our recommendations based on your budget.
Step 6: Cancel your cable TV subscription
Now that you have your streaming plan in place, it's time to cut the cord with your cable company.
- Contact their customer service department to initiate the cancellation process. Be prepared for them to try to retain you as a customer, potentially offering discounts or other incentives. Stay firm if your decision to cancel is final.
- If you have equipment (cable boxes, modems, etc.), follow their instructions for returning it. Failing to return equipment could result in additional charges.
- Ask for written confirmation of your cancellation and any associated fees. Keep this documentation for your records.
- Monitor your billing statements for the next few months to ensure your cable company stops charging you. If you notice any discrepancies, contact them immediately.
Step 7: Set up your streaming device
If you’re streaming through your smart TV, all you need to do to get started is to connect your TV to your WiFi network. If you’re using a streaming device, connect your chosen device to your TV through an open HDMI port and follow the setup instructions. This typically involves connecting to your WiFi network, signing into your streaming services (or signing up for new ones), and customizing your settings.
Most streaming devices have a remote that controls basic TV functions, such as on/off and volume. Once you’ve set your TV to display the HDMI channel your streaming device is attached to and programmed your device remote to pair with your TV (you’ll be walked through this during setup), you won’t need your TV remote for regular viewing.
Step 8: Optimize your streaming experience
Generally, the setup process for your device will go smoothly, and you should be able to dive into enjoying all your new streaming channels. If you find yourself experiencing video buffering or the resolution being downgraded, check the speed of your connection and the strength of your wireless signal in the room where your TV is located (your TV or streaming device should have an option in the settings menu for showing your wireless connection status).
Poor signals can be fixed with an extender or a mesh WiFi system. I use the eero pro 6 system and it works great for getting a strong consistent signal throughout my home (the less expensive eero 6 is almost as good and costs a lot less if you’re on a budget). We’ve also found Google Nest and TP Link mesh systems to work well in our testing.
Summarizing the process
There has never been a better time to switch to streaming. New options for getting internet into your home are driving down prices, and there are numerous streaming devices on the market to meet every budget. And with the right line-up of streaming channels, you can get just about any show you desire, plus discover countless new ones made in-house for Netflix, Amazon, Hulu, and Disney+, among others, all while saving money over your current cable subscription.
If you are going through the process and have questions or would like additional guidance, please ask in the comments below.
[Image credit: Cutting the cord concept BigStockPhoto]
Josh Kirschner is the co-founder of Techlicious and has been covering consumer tech for more than a decade. Josh started his first company while still in college, a consumer electronics retailer focused on students. His writing has been featured in Today.com, NBC News and Time.


From James Noyd on September 29, 2023 :: 1:38 pm
Can one still record and playback shows with cord cutting?
Reply
From Josh Kirschner on September 29, 2023 :: 1:49 pm
Hi Jim,
Yes, the streaming channels for live TV - Sling, YouTube, and Hulu+ - all have DVR features. Hulu+ and YouTube TV have unlimited DVR space (though Hulu+ limits storage to nine months), while Sling includes 50 hours of DVR recording, with the option to upgrade to 200 hours for an additional $5 per month.
Best,
Josh
Reply