We may earn commissions when you buy from links on our site. Why you can trust us.
Photo Tips 201: Get More Out of Your Camera
One of the great things about digital cameras these days is that they take phenomenal photos even on the basic automatic setting. So the first thing to do with a new camera is to charge it up, pop in a memory card and start shooting. It's a great way to get to know your camera. You'll be able to see how fast it focuses, how long it takes for the flash to recharge, and how it does in various lighting situations.
Once you've familiarized yourself with your camera's basic operation, it's time to delve a little deeper. Here are four more things you can experiment with if you really want to put your camera through its paces.

Image: Katherine Gray
Turn off the flash and try some indoor portraiture
On-camera flashes are fine in a pinch, but natural light is almost always best. The flash can wash out skin tone, create harsh shadows, and generally turn a wonderful scene into an unattractive mess. DSLR cameras and high-end point-and-shoots with fast lenses (f/2.0 or faster) handle low-light situations much better than most point and shoot models, so turn off the flash and see how your new baby does.
Beware the yellow color cast of incandescent light bulbs, though! You might need to adjust the white balance to account for the artificial light. Or just put your subject near a window for some lovely natural light shots.
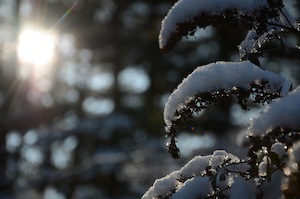
Image: Katherine Gray
Play with selective focus
Getting the right part of your image in focus is important, especially with a DSLR, since these cameras allow you even greater control over how much bokeh (intentional blur) there is in your photograph. If you're not quite ready to go fully manual or are using a point-and-shoot, using Portrait mode will tell your camera that you'd like to have your subject in focus but the background blurred, giving you a great professional-looking photograph.
You can also choose how many focus points your camera uses to determine where it should focus, and which of those points to use inside your frame. A common composition technique is to frame your shot so that your subject isn't exactly in the center of the image, but offset to one side or the other. This can sometimes confuse your camera's autofocus. Using focus point selection or touch to focus, you can tell your camera which part of the frame it should focus on.
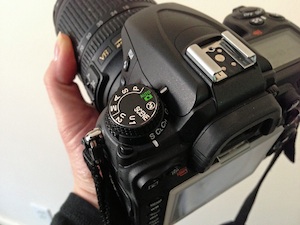
Image: Katherine Gray
Use your camera's mode options like a checklist
Many newer cameras, including DSLRS, have what's called "Scene mode." On DSLRs and high-end point-and-shoots, there are generally more options than the portrait, macro, landscape, and sports modes that used to be the standard. Depending on the brand and model camera you have, it might also feature Night Portrait, Child Portrait, Indoor/Party, Dusk/Dawn, Sunset, Autumn Colors, and others. These modes are designed to make adjustments to your camera's settings in order to optimize your photos in specific situations. So why not try them all? Compare the Auto setting with the appropriate mode, or an inappropriate mode, and see what the difference is!
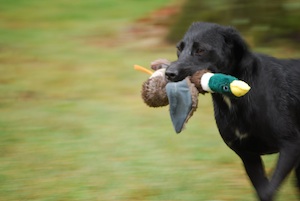
Image: Katherine Gray
Slow down – or speed up – the shutter
One of the great things about cameras with manual control is the ability to control the shutter speed, which can lead to some great photo effects. The classic way to practice using this feature is with moving water – waves on the shore, a waterfall, or even a garden hose or water fountain can provide a fun subject.
Using your camera's Shutter Priority mode, you can choose how fast the shutter opens and closes. A very fast shutter speed will "freeze" motion, giving you perfectly clear, still, individual water droplets. Choosing a slower shutter speed will blur the motion of the water, resulting in that lovely, soft style of photo that you frequently see in nature magazines.
Another fun way to capture motion is to pan with a moving subject so that the subject is in focus but the background is blurred. This is done a lot with racing cars, track runners, and other things which move in relatively predictable ways. Focus on your subject, then as it passes by, take the photo while moving your camera to follow the object or person. It takes practice, though, so be patient!
One of the greatest things about digital cameras is that you can take as many photos as you want, without having to worry about wasting film. So you have no excuse not to experiment! Don't be afraid to try all sorts of different things – the worst that can happen is you'll have to spend some time deleting the photos that didn't work out.
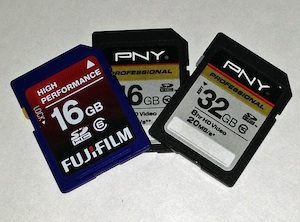
Image: Katherine Gray
DSLR tips
There are a few more important things to keep in mind if you're using a DSLR. One is to pay close attention to the memory card you're using. A DSLR has to process a lot more information much more quickly than a point and shoot camera, so be sure you have a newer speed class 6 memory card, and make sure it's big enough to handle the file sizes. You probably don't need to go all the way up to 32 gigabytes, but go for at least 8.
You'll also want to invest in a good camera bag to protect your investment, and a tripod to make it even easier to shoot at night and in low-light situations. Now that you have the option to use different lenses, a whole new world has opened up! A good quality, fast zoom lens is usually the best to start out with, but don't be afraid to try different types of lenses, from wide angle to fisheye to prime! Some camera shops even let you borrow lenses to try them out before you open your wallet or you can rent them online. And once again, you don't have to worry about buying or developing film, and you can see the results of your experiments immediately.
So get out there and get shooting!

